Ultrasound Skin Tightening: What It Really Does and Whether It’s Worth It
Ultrasound skin tightening is a non-invasive cosmetic procedure that uses focused acoustic energy to stimulate collagen production deep within the dermis. The targeted ultrasound waves heat tissue at precise depths, triggering a natural wound-healing response that gradually firms and lifts loose skin. Benefits typically appear over two to three months as new collagen forms, with results lasting up to a year or more. A single session usually takes 30 to 90 minutes, requiring no downtime and minimal discomfort.
What Exactly Is Ultrasound Skin Tightening and How Does It Differ From Other Facelifts?
Ultrasound skin tightening is a non-invasive procedure that delivers focused ultrasonic energy deep into the dermis and superficial muscular aponeurotic system (SMAS) layer—the same structural layer addressed in surgical facelifts—without cutting or suturing. This energy heats targeted tissue to approximately 60–70°C, triggering immediate collagen contraction and a longer-term wound-healing response that builds new, firmer collagen over 2–3 months. Unlike a traditional surgical facelift, which physically excises and repositions skin and muscle, ultrasound tightening leaves your skin intact, requires zero downtime, and carries no risk of scarring or nerve damage. It also differs from radiofrequency or laser facelifts, which primarily heat the superficial skin; ultrasound penetrates deeper, making it uniquely effective for lax jowls and brow droops. The result is a gradual, natural lift—not a pulled or altered appearance—ideal for mild-to-moderate sagging.

The Core Mechanism: How Focused Sound Waves Trigger Collagen Production
Focused sound waves from ultrasound skin tightening bypass the epidermis to converge at precise dermal depths, typically 1.5 to 4.5 mm, where they generate localized thermal zones exceeding 60°C. This heat denatures existing collagen fibrils, triggering an immediate wound-healing cascade. Fibroblasts within these micro-injured regions then multiply and secrete fresh tropocollagen, which matures into organized, dense collagen bundles over 8–12 weeks. The thermal injury also stimulates myofibroblast contraction, yielding instant tissue tightening while the neocollagenesis continues. The key distinction is that thermal energy is applied in micro-columns, leaving surrounding tissue untouched for rapid recovery.

- Thermal coagulation points activate heat-shock proteins that signal fibroblast activity.
- New collagen aligns along tension lines, mimicking natural youthful architecture.
- Repeated sessions compound results as each wave recruits deeper, thicker dermal layers.
Ultrasound vs. Radiofrequency vs. Laser: Which Technology Targets the Deepest Layers?

Among the three modalities, ultrasound penetrates the deepest, reaching the superficial musculoaponeurotic Sofwave in seoul system (SMAS) layer at 4.5 mm, whereas radiofrequency (RF) heats the dermis and subcutaneous tissue up to roughly 2–4 mm, and laser energy is absorbed within the epidermis and upper dermis (under 1 mm). This depth difference is critical: ultrasound creates thermal coagulation points at the SMAS, triggering collagen contraction and remodeling without burning the surface. RF relies on volumetric heating but dissipates quickly, offering moderate tightening, while laser primarily resurfaces texture rather than lifting. Thus, for true deep structural lift, ultrasound is the only technology that targets the foundational fascial layer—RF and laser remain superficial or mid-dermal tools.
Q: Which technology targets the deepest layers? A: Ultrasound, specifically at 4.5 mm into the SMAS, far exceeding RF’s ~3 mm and laser’s <1 mm reach.< p>
Am I a Good Candidate for This Non-Invasive Procedure?
Wondering if you’re a good candidate for ultrasound skin tightening? It mostly comes down to your skin’s current state. Ideal candidates have mild to moderate laxity, especially around the jawline, cheeks, or brows, and want a subtle lift without needles. If you’re in your 30s to 50s, you’ll likely see the best results since your skin still has decent collagen reserves. However, this treatment won’t fix severe sagging or excess fat—those need surgical options. You should also have realistic expectations, as improvements appear gradually over 2–3 months. Thin skin or prior fillers can affect outcomes, so a quick consultation with a provider to assess your skin thickness and elasticity is your safest bet. If you’re looking for a gentle, no-downtime refresh, you’re probably a solid match.
Skin Laxity Levels: When Is Ultrasound Effective Versus When You Need Surgery?
Ultrasound skin tightening is most effective for mild to moderate skin laxity, where you see early sagging but still have underlying structural support. If your skin bounces back slowly when pinched, or you notice mild jowling or crepey texture, ultrasound can stimulate collagen and visibly firm the area. However, when laxity is severe—marked by deep folds, pronounced下垂, or excess skin that hangs without tension—ultrasound cannot remove the physical surplus. Surgery, such as a facelift, becomes necessary because it excises redundant tissue and repositions deeper layers, which energy-based devices simply cannot replicate. To decide where you fall, follow this sequence:
- Pinch the skin on your cheek or neck; if it returns slowly, you are in the mild category.
- Look for clear jawline definition; if the contour is blurred but not hanging, ultrasound may help.
- If skin visibly drapes over itself or forms deep creases, you exceed the effective range for ultrasound.
Ultrasound will not tighten skin that has lost its elastic limit—only surgical excision restores that tautness.
Which Areas of the Face and Body Respond Best to Acoustic Energy?
For ultrasound skin tightening, the most responsive areas are those with thin, delicate skin overlying bone, where acoustic energy can precisely target the superficial musculoaponeurotic system. The **brow, lower eyelids, and jawline** show dramatic lifting because the collagen-rich dermis there contracts readily. The neck and décolletage respond well due to their loose subdermal layers, while the knees and upper arms benefit from focused energy on thicker tissue. Avoid bony prominences like the chin tip, where energy scatters.
- The midface and cheekbones give the quickest visible lift.
- The submental area (under the chin) tightens with excellent contouring.
- The upper neck and collarbone region shows improved texture and firmness.
What Does the Treatment Session Actually Feel Like—and How Long Is the Downtime?
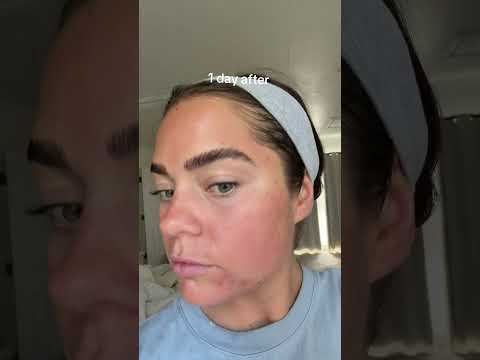
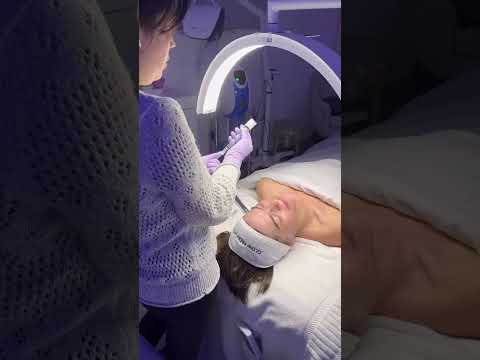
You lie back, and the practitioner glides a smooth probe over your skin—cold gel first, then a faint buzzing that builds into a precise, prickling heat deep beneath the surface. That’s the ultrasound energy targeting the foundational layer. Most people describe it as a series of quick, sharp sensations, like a static zap meeting a warm needle, but it’s utterly tolerable and intermittent, not a constant burn. The treatment session sensation is often compared to a deep-tissue massage with occasional hot pinches, and a typical full-face session runs 30 to 90 minutes, depending on how many areas you’re addressing. There’s no numbing required for most, though a topical cream can ease sensitive spots. Afterwards, your skin may look flushed or slightly swollen, like a mild sunburn—but that fades within a few hours. You can return to work or errands the same day, with only a faint tenderness when you touch your face. The real surprise is the ultrasound tightening recovery time: virtually zero downtime. You’ll notice a slight tightness for a day or two, but no bruising, no peeling, no social exile. Just a quiet, gradual lift over the following weeks as collagen rebuilds.
Key takeaway: Expect 30–90 minutes of tolerable, prickling heat, then flush-and-go recovery—no downtime beyond a few hours of redness and mild tenderness.
How to Choose the Right Ultrasound Device or Provider for Your Skin Type
Choosing the right ultrasound device or provider for your skin type begins with an honest assessment of your dermal thickness and laxity. Thinner, delicate skin—common around the eyes—requires lower-frequency transducers (4–7 MHz) to avoid overheating superficial fat, while thicker, denser tissue benefits from higher frequencies (7–10 MHz) that reach the SMAS layer without burning the dermis. A qualified provider will map your face and neck before treatment, adjusting pulse duration and energy delivery based on your Fitzpatrick scale and hydration levels. Always request a patch test on a small area to observe your skin’s reaction over 48 hours, particularly if you have rosacea, acne scars, or a history of keloids. Avoid devices marketed as “one-size-fits-all”; instead, verify that the machine offers adjustable depth settings and that the operator can demonstrate how they calibrate it for your unique epidermal barrier. Your correct ultrasound device selection hinges on this personalized calibration, not brand popularity.
Key Device Parameters to Compare: Depth of Penetration, Energy Levels, and Cartridge Types
When comparing devices for ultrasound skin tightening, depth of penetration, energy levels, and cartridge types form the core technical triad. Depth dictates which tissue layer receives thermal coagulation—superficial cartridges (1.5 mm) target fine lines, while deeper probes (4.5 mm) reach the SMAS for structural lift. Energy levels, measured in Joules, must match your dermal thickness; too low proves ineffective, too high risks fat atrophy. Cartridge types are not interchangeable—each is calibrated for specific depths and scan areas, so verify the device offers multiple, swappable transducers. A provider who cannot explain how these parameters map to your facial zones likely lacks precision. Thermal dose optimization depends on this trio working in synergy, not in isolation.
Depth, energy, and cartridge choice must align with your skin’s thickness and laxity—never accept a one-size-fits-all setting.
Questions to Ask Before Your First Session to Avoid Burns or Uneven Results
Before your first session, ask the provider to specify the exact transducer depth and energy levels they plan for your skin thickness, since mismatched settings are the leading cause of burns. Inquire how they determine your Fitzpatrick type and whether they will lower intensity for darker tones or thin dermis. Request a patch test on a small area near your jawline, then wait 48 hours to check for hyperpigmentation or blistering. Ask how they map bone-dense zones like the cheekbones and mandible, where overlapped passes often cause uneven results. Finally, confirm they will adjust pulses in real time based on your immediate discomfort response during the procedure.
How Soon Will You See Results, and What Can You Do to Extend the Effects?
With ultrasound skin tightening, initial lifting may be noticeable immediately, but the primary results typically emerge over two to three months as new collagen forms. Full effects usually peak around six months post-treatment. To extend the effects of ultrasound skin tightening, maintain a consistent skincare routine with antioxidants and retinoids, and protect your skin from UV damage daily with broad-spectrum sunscreen. Staying well-hydrated and avoiding rapid weight fluctuations also help preserve the structural support. Most practitioners recommend a touch-up session every 12 to 18 months to sustain firmness. How soon you see results from ultrasound skin tightening depends on your age and baseline laxity, but following aftercare instructions, including gentle cleansing and avoiding heat exposure for a few days, ensures you don’t undermine the collagen response. Patience is key, as gradual improvement is the intended outcome.
The Realistic Timeline: Immediate Tightening vs. Collagen Remodeling Over 3–6 Months
Right after your session, you’ll notice immediate tightening—roughly 10–15% of the final lift—from thermal contraction of existing collagen fibers. This is not the endpoint. The deeper response unfolds as your body initiates collagen remodeling over 3–6 months, replacing old, lax tissue with fresh, densely packed fibers. The timeline follows a predictable sequence:
- Weeks 1–2: mild tightening and subtle surface smoothing as micro-inflammation subsides.
- Months 1–3: progressive dermal thickening, with visible lift in the jawline or cheeks around week 8.
- Months 3–6: peak structural reinforcement, where results settle into their final, most durable state.
Do not judge the outcome at week 2—full remodeling requires the full window. To protect this timeline, avoid excessive heat or facial massage for the first month, and maintain consistent hydration to support fibroblast activity.
Skincare and Lifestyle Habits That Complement the Lifting Effect
To make your ultrasound skin tightening results last, pair the lift with smart daily habits. Keep your skin hydrated with a ceramide-rich moisturizer—plump skin reflects light better and maintains that firmer look. Always apply SPF 30+ religiously, since UV breaks down collagen and can erase your gains. Skip harsh scrubs and instead use a gentle vitamin C serum to support collagen production. Sleep on a silk pillowcase to avoid creasing the skin. Also, stay consistent with facial massage—light upward strokes can help maintain lymphatic drainage and prolong the lifting effect. Don’t forget hydration from within; drink enough water daily.
Lifestyle habits like consistent sun protection and hydration can visibly extend the lifting effect.
**Q: Do I need to avoid working out after treatment to protect the lift?**
A: Not for long—just skip intense sweating for 24 hours. Mild activity is fine, but afterwards, regular exercise actually boosts circulation and keeps skin metabolism working, which can help maintain your ultrasound results.
What Are the Potential Side Effects, and How Can You Minimize Discomfort?
Most people tolerate ultrasound skin tightening well, but you might notice some redness, mild swelling, or slight tenderness right after—think of it like a light sunburn that fades within a few hours to a day. Rarely, you could feel tiny bruises or a tingly sensation, but these are temporary. To minimize discomfort, ask your provider for a lower energy setting if you’re sensitive, and apply a cool pack for 10 minutes post-treatment. Skip hot showers, saunas, and heavy exercise for 24 hours, and keep your skin hydrated with a gentle, fragrance-free moisturizer. Avoid ice directly on the skin—wrap it in a cloth. *“How long does redness last?”* Usually under 48 hours, but if it lingers, use a soothing aloe gel. Stick to these steps, and the payoff (tighter skin) will feel worth the tiny trade-off.
Common Post-Treatment Sensations: Redness, Tingling, and Temporary Soreness
Following ultrasound skin tightening, the most frequently reported sensations are localized redness, tingling, and temporary soreness, which collectively indicate a normal inflammatory healing cascade. Redness typically emerges immediately as superficial vasculature dilates in response to thermal energy, while tingling—often described as a prickly or buzzing feeling—arises from transient micro-edema around treated nerve endings. Soreness, usually mild, peaks within 24–48 hours as collagen contraction triggers tissue remodeling. These effects are self-limiting, resolving within three to five days. To minimize discomfort, apply cool compresses intermittently, avoid hot showers, and use only gentle, fragrance-free moisturizers. Over-the-counter acetaminophen can address soreness, but avoid NSAIDs if bruising is present.
- Redness fades within hours to two days; protect skin with SPF to prevent irritation.
- Tingling subsides faster when you stay hydrated and avoid caffeine post-treatment.
- Use a soft, cool gel pack for 10-minute intervals to ease soreness without excessive pressure.
Contraindications: Who Should Avoid Acoustic Tightening Altogether?
Acoustic tightening isn’t for everyone, and knowing who should avoid it altogether is your first safety filter. **Contraindications for ultrasound skin tightening** include pregnancy, active skin infections, open wounds, or severe cystic acne in the treatment zone—energy can worsen inflammation. People with pacemakers, metal implants near the face, or autoimmune disorders like lupus should skip the procedure entirely, as focused ultrasound may interfere with devices or trigger flare-ups. Also avoid if you’ve had recent chemical peels, radiation therapy, or are taking blood-thinning medication. A history of keloid scarring is another hard stop, since acoustic energy may overstimulate collagen and cause raised scars.
How Much Should You Budget for Ultrasound Tightening—and Why Do Prices Vary So Much?
For ultrasound skin tightening, expect to budget between $1,500 and $4,500 per session, as most patients need one to two treatments. Prices vary so much because the device’s energy depth and number of delivered pulses directly dictate cost—treating the neck and lower face with high-density lines requires more cartridges and time than a quick brow lift. Your geographic location and the practitioner’s experience also influence fees, but the biggest hidden variable is how aggressively you target sagging. A lighter “maintenance” dose costs less, while a full-face, deep-layer lift using multiple probe depths (both 3.0mm and 4.5mm) drives the price upward. Before booking, ask for a fixed quote based on your specific anatomical plan, not a per-area estimate, and verify whether a follow-up touch-up is included.
Cost Per Session vs. Package Deals: Calculating What You Actually Need
When budgeting for ultrasound tightening, a single session might seem cheaper upfront, but package deals usually lower your cost per session if you’re planning multiple rounds. Most people need 2–3 treatments for visible lift, so ask yourself: can you commit to the full course? If yes, a package saves 15–20% typically. If you’re unsure or just want a quick refresh, pay per session first—then upgrade later. Here’s how to calculate what you actually need:
- Estimate your goal—maintenance (1 session) vs. firming (2–3 sessions).
- Compare the package total to single-session price × the sessions you truly need.
- Check if the package has a validity window—if you won’t use it in time, skip it.
Beware of Bargain Pricing: What Cheap Treatments Typically Leave Out
A rock-bottom price for ultrasound tightening usually means the provider is cutting corners on what actually delivers results. Cheap treatments typically leave out multiple passes over fibrous areas, skimping on higher-energy cartridges, or using outdated tips that lose efficacy. You might also miss proper numbing, a full consultation, or a realistic assessment of your anatomy—rushed sessions often target only the mid-face, ignoring the jawline and neck that need equal attention. What seems like a steal often translates to half the treatment time and half the collagen response. Before booking, ask exactly how many passes and which depth cartridges are included. Beware of bargain pricing that hides the true cost of inadequate, unsupported results.
Can You Combine Ultrasound Tightening with Other Cosmetic Procedures for Better Results?
Yes, you can combine ultrasound tightening with other cosmetic procedures, and doing so often yields superior, more comprehensive results. For sagging skin, ultrasound energy rebuilds deep collagen, while injectables like dermal fillers or Botox address volume loss and dynamic wrinkles on the surface—a layered approach that tackles both structure and expression lines simultaneously. Pairing it with microneedling or laser resurfacing is also practical, as these target the epidermis and superficial dermis, while ultrasound works at a deeper depth, creating a full-thickness remodeling effect. However, you must sequence treatments carefully: perform ultrasound first, then wait two to four weeks before invasive modalities to avoid interfering with collagen regeneration. Combining them in one session is rarely advisable, as thermal stress plus trauma can overwhelm skin recovery time. Ultimately, a tailored plan with a clinician—layering ultrasound with neurotoxins, fillers, or light peels—boosts both lifting and texture, but never stack aggressive procedures simultaneously. Done sequentially, the synergy is real and lasting.
The Best Pairings: Dermal Fillers, Botox, and Microneedling—Which Order Works First?
To maximize synergy with ultrasound tightening, sequence matters: dermal fillers, Botox, and microneedling each target different depths, so layering them correctly prevents distortion. First, schedule Botox at least two weeks before ultrasound—relaxed muscles let the thermal energy settle evenly without trapping expression lines. Next, perform microneedling one week post-ultrasound, but only if your skin shows no residual heat sensitivity; this boosts collagen while the deeper lift is already underway. Finally, reserve fillers for three to four weeks after ultrasound, once tissue remodeling has stabilized, so injected volume sets naturally rather than being displaced by swelling. The practical order is:
- Botox (two weeks prior)
- Ultrasound tightening
- Microneedling (one week later)
- Fillers (three to four weeks later)
This chronological cascade lets each modality build on the last without competing for the same recovery window.
Why Combining Treatments Too Quickly Can Undermine Your Collagen Response
Stacking ultrasound tightening with other energy-based treatments before the initial collagen cascade finishes is counterproductive. Ultrasound induces a controlled inflammatory response, triggering fibroblasts to produce new collagen over roughly 90 days. If you introduce a second modality, such as laser resurfacing or microneedling, too soon—especially within the first 4–6 weeks—you interrupt this natural synthesis, forcing the dermis into a repair mode for acute injury rather than sustained remodeling. The result is a blunted, less organized collagen response, sometimes even leading to suboptimal tightening or prolonged redness. Rushing sequential protocols reduces net collagen yield because each insult competes for the same cellular resources. Space procedures at least six to eight weeks apart, ideally three months, to lock in structural gains.
Q: How quickly can I safely add a laser after ultrasound tightening?
Wait a minimum of six to eight weeks, but ideally 12, because the collagen response peaks around days 30–60 and remodeling continues for months. Adding laser earlier disrupts that active phase, undermining the very density and firmness you sought.
How to Prepare Your Skin in the Weeks Before the Procedure for Optimal Outcomes
Start prepping about two to three weeks out by ditching retinoids, acids, and any harsh exfoliants—they leave skin too sensitive for the ultrasound energy to target comfortably. Instead, focus on deep hydration: slather on ceramide-rich moisturizers and drink extra water daily, as well-hydrated tissue conducts the sound waves more evenly, giving you a smoother, more uniform lift. Skip facials with active peels or microdermabrasion during this window, and definitely halt any topical vitamin A or benzoyl peroxide. Protect your skin religiously with SPF 50, because even a slight tan or sunburn can increase discomfort and reduce treatment depth. **Q: Can I use a jade roller before the procedure? A: Yes, gentle massage is fine, but avoid anything that leaves skin red or inflamed.** Keep your routine boring and barrier-focused—cleanse gently, moisturize twice daily, and don’t try anything new. That’s the entire secret.
Skincare Swaps to Make: Retinoids, Vitamin C, and Hydration Strategies
In the weeks before ultrasound skin tightening, strategically swap your active skincare to build tolerance without compromising the procedure’s heat-based collagen remodeling. Replace high-dose, daily retinoids with a low-concentration formulation applied every third night, halting entirely five days prior to treatment to prevent barrier irritation that could amplify thermal sensitivity. Introduce stabilized Vitamin C (L-ascorbic acid) each morning to bolster antioxidant defenses against procedural oxidative stress, but discontinue it 48 hours before to avoid any acidic sting. Simultaneously, shift hydration from humectant-heavy serums to ceramide-rich moisturizers layered over damp skin, and increase water intake by 500 mL daily. This pre-procedural trio—adjusted retinoid frequency, timed antioxidant support, and barrier-focused moisture—ensures the skin’s lipid matrix is resilient enough to recover swiftly from targeted microfocal injury.
Foods and Supplements That Boost Your Body’s Natural Collagen Synthesis
In the weeks before your ultrasound skin tightening, you can give your body’s collagen factory a serious head start with the right foods and supplements. Since the procedure relies on your natural healing response, loading up on collagen-boosting nutrients for pre-treatment skin prep makes a real difference. Prioritize vitamin C from citrus, bell peppers, or kiwi—it’s a co-factor your body absolutely needs to build new collagen fibers. Add amino acid-rich proteins like bone broth, eggs, or salmon, plus zinc from pumpkin seeds or oysters. A daily collagen peptide supplement with added hyaluronic acid also helps. Here’s a simple sequence to follow:
- Start daily vitamin C (500–1000 mg) or whole-food sources, ideally with meals.
- Incorporate 10–15 grams of collagen peptides in your morning coffee or smoothie.
- Pair those with a handful of berries or leafy greens for antioxidants that protect existing collagen.
- Maintain this routine for at least two full weeks before your appointment.
This way, your skin enters the treatment primed to rebuild quickly and visibly.
What Results Can You Realistically Expect—and How Does It Compare to a Thread Lift?
With ultrasound skin tightening, you’re looking at a gradual, natural build—think 10–20% noticeable lift over 2–3 months as collagen regenerates, with results lasting up to a year or more. It’s subtle, not a dramatic change, so if you expect a pulled, taut look, you’ll be underwhelmed. A thread lift, by contrast, gives you an immediate, visible “snap” that’s more pronounced, but that effect fades faster (6–12 months) and comes with bruising, swelling, and a small risk of visible threads or skin dimpling. Ultrasound wins for zero downtime and steady, undetectable improvement—you’ll look rested, not altered. The real trade-off is patience versus payoff: you trade the instant gratification of threads for a softer, more forgiving outcome that builds quietly. For mild-to-moderate laxity, ultrasound is the low-commitment choice; for significant sagging, threads will honestly do more heavy lifting, though neither replaces a surgical lift.
Managing Expectations: Subtle Lifting vs. Dramatic Surgical Changes
Ultrasound skin tightening delivers a gradual, structural lift rather than a visible surgical pull, so you must measure success by tissue contraction over three to six months, not by immediate mirror changes. The treatment thickens collagen and elastin layers, yielding a subtle jawline definition and softened nasolabial folds, but it cannot excise excess skin, redrape deep fat compartments, or alter muscle position the way a facelift does. If you expect brow repositioning or midface volume redistribution, you will be disappointed; instead, compare pre-procedure photos at identical angles to notice the modest, natural shift. For moderate laxity, this non-invasive route satisfies, but severe jowling or heavy neck bands demands surgery. Budget for maintenance sessions, as results fade within two years, whereas surgical changes are permanent.
Subtle lifting from ultrasound is a realignment of existing tissue—not a surgical reset; matching your laxity grade to this technique’s ceiling prevents unmet expectations.
Ultrasound vs. PDO Threads: Which One Gives You Better Value for Mild to Moderate Sagging?
For mild to moderate sagging, ultrasound skin tightening offers better upfront value than PDO threads because one session costs less and requires no downtime, while threads demand a higher fee for immediate lift but carry risks like puckering or extrusion. Ultrasound stimulates collagen gradually, with results peaking at three months and lasting up to a year, whereas PDO threads provide instant mechanical support that fades within six to nine months as sutures dissolve. If your priority is minimal interruption and natural progression, ultrasound wins; if you need quick visible correction despite the higher price and recovery, threads justify their cost. For most mild cases, repeating ultrasound annually is more budget-friendly than replacing threads.
| Aspect | Ultrasound | PDO Threads |
|---|---|---|
| Upfront cost | Lower per session | Higher per session |
| Downtime | None | 1–3 days swelling |
| Onset of result | 2–3 months | Immediate |
| Duration | 12 months | 6–9 months |
| Risk profile | Mild redness | Puckering, thread migration |